










The Ashlery Installation Guide
Wall lights
Indoor sconces, outdoor wall lights and rechargeable pieces — where to place them, how they are fixed and how to enjoy them for years.
Chapter 1
Before you begin
A well-placed wall light changes the whole feel of a room. A few minutes of planning now means your light sits at exactly the right height, perfectly level, for years.
Installed by a licensed electrician — always.
In Australia, connecting a light or fan to your home’s fixed wiring must be done by a licensed electrician. It is the law in every state and territory, and it protects your home, your insurance and your warranty.
This guide shows you everything you can plan and prepare yourself, and gives your electrician a clear, step-by-step checklist so the job is quick and done right first time.
What you can do
- Choose the position and mark the height
- Check the wall type (next chapters)
- Confirm the switch you want to use
- Unpack and check all parts
- Fit bulbs and shades once installed
What your electrician does
- Run or extend cabling to the new position
- Connect the fitting to the fixed wiring
- Confirm safety-switch (RCD) protection
- Test everything and issue compliance paperwork
Rechargeable wall lights need no electrician.
If your Ashlery wall light is rechargeable (USB-C), you can install it yourself in about 15 minutes — jump to chapter 5.
Unbox and check
Open the carton on a soft, clean surface — a folded blanket or the empty box lid is ideal — and lay every part out before anything is installed.
- The fitting itself and any shade, glass or diffuser
- Mounting bracket or plate
- Screws, wall plugs and any connector block
- Canopy (the cover that sits against the ceiling or wall)
- Bulb (if supplied) — some models use an integrated LED
- The manufacturer’s leaflet — keep it with this guide
Keep the packaging until everything works perfectly.
If a part is missing or arrived damaged, take a photo and contact us before installation — we will sort it out quickly.
Chapter 2
The perfect height
For most rooms, the centre of a wall light sits just above eye level, so the light washes the wall without shining in anyone’s eyes.
The rule of thumb
Mount the centre of the fitting 1.6 – 1.7 m above the finished floor. On a standard 2.4 m Australian ceiling this leaves a balanced gap above and below.
Up-and-down lights can sit a little higher (up to 1.8 m) to give the beam room to spread. On a staircase, measure from the nose of the step directly below.
| Where | Centre of fitting | Tip |
|---|---|---|
| Living & dining | 1.6 – 1.7 m | Keep pairs at exactly the same height — use a laser or spirit level |
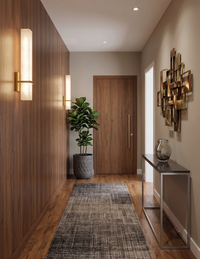
| Hallway | 1.6 – 1.7 m | Space 2.4 – 3 m apart, half a gap from each end |
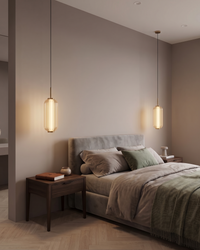
| Bedside | 1.2 – 1.4 m | About 50 – 60 cm above the mattress, centred over the bedside table |
| Bathroom mirror | Around eye level, each side | Wet-area zones apply — see chapter 4 |
| Outdoor, beside a door | 1.7 – 1.8 m | In line with, or just below, the top of the door |
Chapter 3
Rooms & spacing
Pairs and rows
Lights in a pair look intentional only when they mirror each other exactly. Measure from a fixed point (the centre of the bed, the edge of a door frame) rather than from the corner of the room, which is rarely square.
Outdoors
Choose a fitting whose rating suits its exposure:
| Rating | Suitable for |
|---|---|
| IP44 | Covered verandas and porches |
| IP65 | Exposed walls, rain and garden sprinklers |
For a balanced look beside a front door, choose a fitting roughly a quarter of the door’s height (Australian doors are usually 2.04 m tall).
Living by the coast?
Salt air is tough on any metal. Wipe outdoor fittings with a cloth dampened in fresh water once a month to keep the finish looking new.
Chapter 4
Prepare the wall
How a wall light is fixed depends on what is behind the paint. Knock on the wall: a hollow sound usually means plasterboard, a solid one means brick or block.
| Wall type | Common in | How it is fixed |
|---|---|---|
| Plasterboard on timber or steel studs | Most homes since the 1970s | Into a stud where possible; otherwise heavy-duty plasterboard anchors rated for the fitting’s weight |
| Brick veneer / double brick | Older homes, external walls | Masonry drill bit with the supplied wall plugs |
| Concrete or block | Apartments | Masonry bit and plugs; check with strata before drilling common walls |
Before anyone drills: scan for cables and pipes.
Cables often run straight up or down from switches and power points. Use a cable and stud detector and never drill directly above or below a switch or power point.
Bathrooms and laundries.
Wet-area zones apply around baths, showers and basins: only fittings with the right IP rating may be installed within set distances. Your electrician will confirm the right position.
Tools you’ll want on hand
Chapter 5 · For your electrician
Installation, step by step
Hand this page to your electrician. It summarises how Ashlery wall lights are installed; the manufacturer’s leaflet in the box takes precedence for any model-specific detail.
Isolate the circuit at the switchboard
Switch off the lighting circuit (not just the wall switch), then lock or tag it so no one can turn it back on while work is under way.
Prove it is dead
Test the conductors with an approved voltage tester before touching anything. Never rely on the wall switch alone.
Remove the old fitting
Disconnect and remove the existing fitting. Check the condition of the existing cable and its insulation; replace anything brittle or damaged.
Fix the bracket to the structure
Screw the mounting plate to a stud, noggin or masonry using fixings suited to the wall and the fitting’s weight. Check it is level before the final turn of each screw.
Connect the fitting
Connect Active, Neutral and Earth to the fitting’s terminal block, following the colour chart below and the manufacturer’s leaflet. Tighten each terminal firmly and make sure no bare copper is visible.
Mount the fitting
Tuck the cable neatly into the wall cavity or back box, offer the fitting up to the plate and secure it with the fixing screws. Make sure no cable is pinched behind the backplate.
Finish
Fit the bulb (check the base type and maximum wattage on the label), then the shade or glass. Tighten glass by hand only — never over-tighten.
Restore power and test
Turn the circuit back on, test the switch (and dimmer, if any), and check that the fitting is secure, level and free of movement. Your electrician will issue the compliance paperwork required in your state.
Australian wiring colours
older homes: red
older homes: black
older homes: green
Double-insulated fittings.
Some decorative fittings are double insulated (marked with a square inside a square) and have no earth terminal. In that case the earth conductor is terminated safely at the point and not connected to the fitting.
Rechargeable wall lights: install it yourself
Charge first
Fully charge the light with the supplied USB-C cable before mounting it, so you can test it in place.
-
Mark
Hold the plate at the height you chose, check it is level, and mark both holes.
Scan, drill and plug
Scan for cables, drill the holes with the right bit and tap the wall plugs in flush.
Screw and attach
Screw the plate firmly, then slide or click the light onto it (magnetic models simply snap in place).
Chapter 6
First light
The right bulb makes all the difference. Before buying, check the base type and the maximum wattage printed inside the lamp holder.
| Room | Colour temperature | Feel |
|---|---|---|
| Living, dining, bedroom | 2700 – 3000 K (warm white) | Soft, relaxed, flattering |
| Kitchen, bathroom, study | 3000 – 4000 K | Crisp and clear for tasks |
| Outdoor | 2700 – 3000 K | Welcoming, kinder to wildlife |
Dimming.
Only dimmable LED bulbs work on a dimmer, and older dimmers can make LEDs flicker. Ask your electrician for an LED-compatible (trailing-edge) dimmer.
Chapter 7
Care & troubleshooting
Care
- Switch off and let the bulb cool before cleaning or changing it.
- Dust with a soft, dry microfibre cloth; never spray liquid directly onto a fitting.
- Clean glass with a lightly dampened cloth and dry it straight away.
- Outdoors, check seals and glass once a season.
Troubleshooting
| If… | Check this |
|---|---|
| The light doesn’t turn on | Bulb seated correctly? Safety switch tripped at the switchboard? Rechargeable models: charge for a full cycle. |
| It flickers | Usually a dimmer that isn’t LED-compatible, or a non-dimmable bulb on a dimmer. |
| The safety switch trips | Switch off and call your electrician — often moisture in an outdoor fitting. |
| The fitting isn’t level | Your electrician can loosen the plate screws and re-level in minutes. |
We’re here to help
Questions before or after installation?
Every Ashlery piece is covered by our 5-year warranty. Send us a photo of your space or your ceiling and a real person will reply, 7 days a week.

 Chat on WhatsApp